July 14, 2026
How to Install Beadboard Ceiling Panels
Introduction
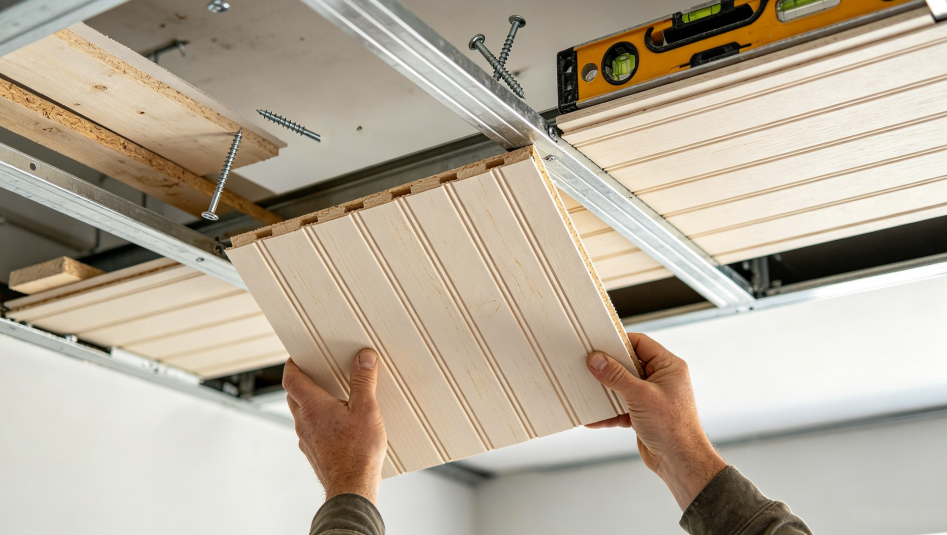
There's something about a beadboard ceiling that just feels right. It adds texture, warmth, and a touch of old-school character that flat drywall simply can't match. Whether you're covering up an ugly popcorn ceiling, finishing a porch, or giving a laundry room some personality, beadboard is a project that delivers serious visual impact for a relatively modest investment.
The good news is that beadboard is one of the more approachable ceiling projects you can take on. The material is lightweight, the tongue-and-groove system makes alignment straightforward, and the learning curve is manageable for anyone with basic carpentry skills. A typical beadboard ceiling installation takes about 2 to 3 days, including finishing steps like filling nail holes and painting, and falls into the intermediate skill level category.
The bad news? There are a few ways to get it wrong. And most of them happen before you even pick up a nail gun.
This guide walks you through the entire process—from choosing between boards and panels to cutting around light fixtures and installing crown molding. No fluff, no filler, just what you actually need to know.
Boards vs. Panels: Know What You're Buying
Before you start measuring, you need to understand the difference between beadboard boards and beadboard panels. They are not the same thing, and choosing the wrong one for your project can make the difference between a professional-looking ceiling and a frustrating experience.
Beadboard boards are individual tongue-and-groove planks—typically about 3½ to 4 inches wide and available in 8-foot or longer lengths. Real wood beadboard is about 5/16 inches thick and has a routed groove down the center, which gives it the classic "bead" look. When installed, each plank appears to be two narrow planks. These boards provide a more authentic, dimensional finish and are less likely to sag over time. They also give you more flexibility to work around obstacles like vents and light fixtures.
Beadboard panels are large sheets—typically 4 feet by 8 feet—that mimic the look of traditional beadboard but come in a single piece. They're usually made from MDF or HDF, often pre-primed and ready to paint. Panels go up faster and cover more area with less cutting, but they can look flatter and less authentic than individual boards. They're also heavier and more awkward to maneuver, especially on a ceiling.
For most DIYers doing a room ceiling, individual boards are the better choice. They're easier to handle one at a time, they look better, and the tongue-and-groove system practically guarantees a tight fit. Panels make sense if you're covering a very large area quickly or if budget is the primary constraint. But if you want a ceiling that looks like it was done by someone who cared, go with boards.
Materials and Tools
Here's what you'll need before you start:
Materials:
Beadboard planks (tongue-and-groove) — calculate square footage and add 10% for waste
1×3 or 1×4 furring strips (if needed for strapping)
Construction adhesive (if installing over drywall)
1¼-inch to 1½-inch brad nails or finish nails
Crown molding or flat stock for perimeter trim
Latex caulk and caulking gun
Lightweight spackle or wood filler
Primer and paint
Tools:
Chop saw or miter saw for cutting planks to length
Table saw or circular saw for ripping the final board
Jigsaw for cutting around light fixtures and vents
Brad nailer (pneumatic or battery-powered)
4-foot level
Tape measure
Chalk line
Stud finder
Rubber mallet
Safety glasses and dust mask
Putty knife
Damp rags
Preparation: The Step Most People Skip
This is where the pros separate themselves from the amateurs. Take the time to get the prep right, and the installation will go smoothly. Rush through it, and you'll be fighting the ceiling the whole way.
Acclimate the Material
Wood moves. It absorbs moisture from the air and expands, then contracts when it dries out. If you take beadboard straight from the store and nail it up, it will shrink and leave gaps between the boards.
Before you install, leave the planks in the room for several days to acclimate to the same temperature and humidity. This allows them to reach equilibrium with the room's moisture level. While they're acclimating, prime or stain both sides and all edges of each plank. This seals the wood and prevents moisture from migrating through the plank and causing blistering on the finished surface.
Check for Level and Square
Very few rooms are perfectly square. Before you start installing, measure across the diagonal corners of the ceiling. If the measurements aren't equal, the room isn't square. Then measure across each opposing wall to determine how far out of square the room is. This will tell you how much adjustment you'll need to make.
Also check if the ceiling is reasonably level and flat. If the existing ceiling is uneven, you may need to install furring strips and shim them to create a flat plane before attaching the beadboard.
Locate the Joists
You need to know where the ceiling joists are. If you've removed the old drywall, you can see them directly. If you're installing over existing drywall, use an electronic stud finder to locate the joists and snap chalk lines along their centers. Joists are typically spaced 16 inches on center.
The beadboard should be installed perpendicular to the ceiling joists. This ensures that every board has adequate nailing support across its length. If you're installing parallel to the joists (for design reasons), you'll need to install strapping first to provide a nailing surface.
Add Strapping If Needed
If your existing ceiling is uneven, or if you need to install the boards parallel to the joists, strapping is the answer. Install 1×3 or 1×4 furring strips perpendicular to the joists at 16 inches on center. Use shims behind the strapping to level the ceiling. This gives you a flat, consistent nailing surface and allows you to adjust for any dips or humps in the original ceiling.
For ceilings that already have drywall in good condition, you can install the beadboard directly over the drywall using construction adhesive and nails. Just make sure the surface is clean and free of loose paint or texture that could prevent good adhesion.
Installation: Step by Step
Step 1: Establish a Reference Line
Start by finding the centerline of the ceiling and snapping a chalk line parallel to the wall. This gives you a straight reference to work from. Even if the room is out of square, aligning the planks to the centerline will make the ceiling look straight.
Step 2: Install the First Board
The grooved edge of the first board always goes against the wall. This way, the tongue faces out into the room, and each subsequent board slides its groove over the previous tongue.
Hold the first board in position against the wall. Measure across the ceiling to the opposite wall to ensure the board is parallel. If the top and bottom measurements don't match, angle the board slightly until they do.
Drill small pilot holes through the face of the board near the wall and nail that edge to the joists. These face nails will be covered by the crown molding later. For the rest of the first board, drive nails at an angle through the tongue into the joists—this is called blind nailing. The nails in the tongue will be hidden by the next board's grooved edge.
Space your nails about every 16 to 18 inches along each joist.
Step 3: Install the Remaining Boards
For the second and subsequent boards, press the grooved edge over the exposed tongue of the previous board. If it doesn't fit tightly, hold a scrap piece of beadboard against the outer edge and tap it lightly with a hammer. Be gentle—the tongue is fragile, and damaging it will make the next board impossible to fit.
Secure each board by nailing through the tongue at an angle into the joists or strapping. The nails should be driven at a strong angle through the top of the tongue—similar to how you'd install hardwood flooring.
Use a nail set to gently tap the nail heads slightly below the tongue surface so they don't interfere with the next board's groove.
Step 4: Cut Around Obstacles
When you encounter a light fixture, vent, or other obstruction, you'll need to cut the board to fit around it.
For a recessed light, remove the decorative trim, hold it against the ceiling where the fixture is located, and trace where it overlaps the board. Use a compass to complete the trace pattern. Then cut the board along the line with a jigsaw.
Measure twice, cut once. And remember: once a hole is cut in tongue-and-groove, you're kind of stuck with it. Take your time.
Step 5: Install the Final Board
Unless you're extremely lucky, the final board will be too wide to fit as-is. You'll need to rip it down to size using a table saw or circular saw.
Measure the remaining gap carefully, accounting for the tongue that needs to fit into the groove of the previous board. Cut the final board to the proper width, slide it into place over the tongue, drill pilot holes, and nail it through the face like you did with the first piece.
Step 6: Install the Trim
Once all the boards are up, install crown molding or flat stock around the perimeter to cover the gaps where the boards meet the walls. Cut corner pieces to meet at 45-degree angles. The molding serves two purposes: it hides the face nails on the first and last boards, and it gives the ceiling a finished, intentional look.
Step 7: Fill, Caulk, and Paint
Run a thin bead of caulk over the seams where boards meet and immediately smooth it out with a damp rag. Do the same where the crown molding meets the paneling.
Use lightweight spackle or wood filler to fill nail holes. Let it dry, sand smooth, and wipe with a damp cloth.
Paint the entire ceiling. Primer first, then at least one coat of finish paint (two is better). If you pre-primed the boards before installation, you may only need one finish coat.
What to Watch Out For
Don't install over a sagging ceiling. Fix any drooping or uneven spots first. The beadboard will only make existing problems more visible.
Check moisture content. For interior installations, don't install when moisture content is over 8%.
Use the right fasteners. Screws are often preferred over nails for ceiling applications because they hold more securely. If you use nails, 1¼-inch to 1½-inch brad nails are standard.
Don't glue the tongues. The boards need to move slightly with changes in humidity. Gluing the tongues can cause problems.
Start from an edge, not the middle. Starting in the middle creates alignment problems at the walls.
Paint before you install. Priming both sides of each board before installation is critical for moisture control. It also makes the final painting much easier—painting the grooves after installation is the hardest part.
Cost and Timeline
A typical beadboard ceiling project costs about $225 to install and paint in an average-sized bathroom, not including tools. Expect to spend 2 to 3 days on the project, including prep work and finishing.
Beadboard planks cost about $1.25 to $1.50 per square foot in 8-foot lengths. Individual boards run about $1.50 each for 3½-inch wide, 8-foot lengths.
FAQ
Q: Can I install beadboard over existing drywall?
A: Yes. As long as the drywall is in good condition, you can install beadboard directly over it. Use construction adhesive and nails or screws long enough to reach the ceiling joists. Remove any loose paint or texture first, and make sure the surface is clean.
Q: Should I use nails or screws for a beadboard ceiling?
A: Either works, but screws hold more securely in overhead applications. If you use nails, a brad nailer with 1¼-inch to 1½-inch nails is standard. Many pros use a combination of adhesive and nails.
Q: How do I cut beadboard around light fixtures?
A: Remove the fixture's decorative trim. Hold the board in place and trace the opening. Use a compass to complete the trace pattern for a precise fit. Cut with a jigsaw.
Q: What's the best way to hide the gap at the walls?
A: Crown molding or flat stock trim around the perimeter covers the gaps. It also hides the face nails on the first and last boards.
Q: Do I need to prime beadboard before installing?
A: Yes. Prime both sides and all edges of each plank before installation. This seals the wood and prevents moisture from causing problems later.
Q: How long does a beadboard ceiling last?
A: With proper installation and maintenance, a beadboard ceiling can last decades. Beadboard ceilings are long-lasting, require low maintenance, and some manufacturers offer 50-year limited warranties. Regular dusting and occasional touch-up painting are all that's needed.
Conclusion
Installing a beadboard ceiling is one of those projects that looks complicated until you actually do it. The tongue-and-groove system is forgiving, the material is manageable, and the results are genuinely transformative.
The key is preparation. Let the wood acclimate. Prime everything. Find your joists. Check for level. Establish a straight reference line. Do those things right, and the installation itself is almost routine.
Skip them, and you'll be fighting the ceiling the whole way.
Take your time. Measure twice. And when you stand back and look at that textured, character-filled ceiling, you'll know it was worth the effort.